How to Build PAX on First Data (OMAHA)
Go to CRM > Search MID in 'Merchant Search' box
Click on Merchant Summary (Be sure to keep this window open as you will be referring back to it)
Go to Datawire site (refer to password spread sheet) > Login
Proceed to fill out form below using merchant info on CRM
Merchant Business Name - Merchant name
Doing Business As (DBA) - Merchant name
Street - enter as is in CRM
City - enter as is in CRM
State/Province -
Zip / Postal Code -
Merchant contact name - First & Last Name
Merchant Phone number - must be filled out with NO dashes (CRM)
Merchant Contact email - enter email address on file (CRM)
Confirm merchant contact email - enter email address on file (CRM)
Processing Platform - this can be found in CRM under merchant summery next 'Back End'
Software Application - PAX Technology / Broad POS
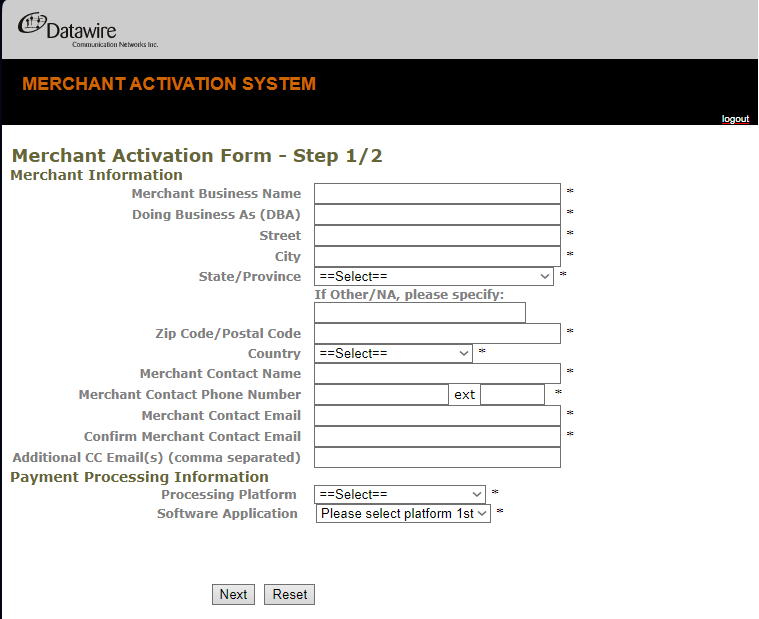
Proceed to click 'Next'
At this point you can input merchant number (be sure to take off the last zero)
Download TID / Device ID - this will be the last 3 numbers of MID following by 3 sequential numbers.
For example:
If mid last 3 are 546 you would input 5461 click add then,
5462 click add
5463 click add
You should be able to add at least 3 or 4 TID's
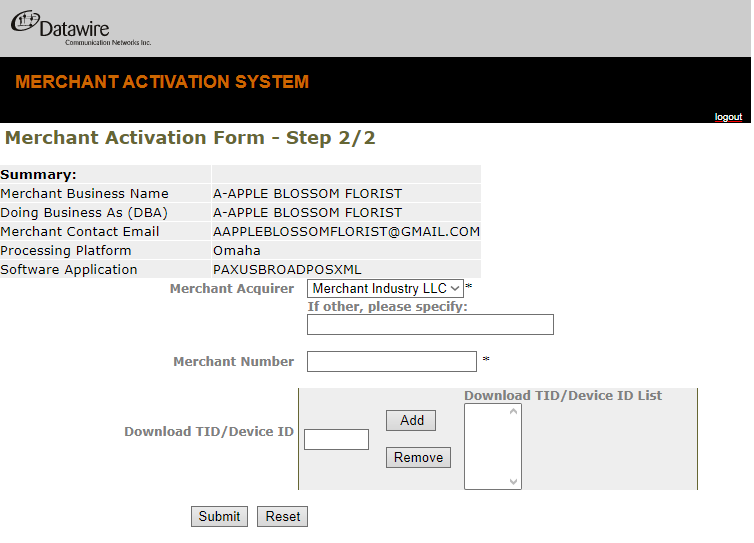
Proceed to click on Submit
You should now see a page similar to the one below. (Be sure to take a screenshot of this page, you will be using the TID's listed below for your pax file)
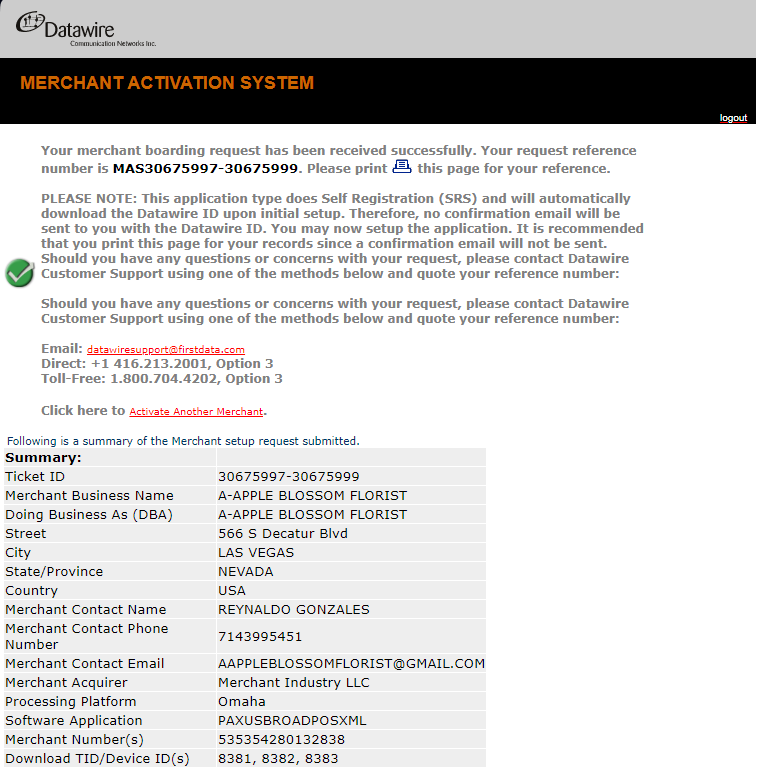
At this point we can now open the PAX Portal
Once in the PAX portal be sure to be on 'BroadPOS'
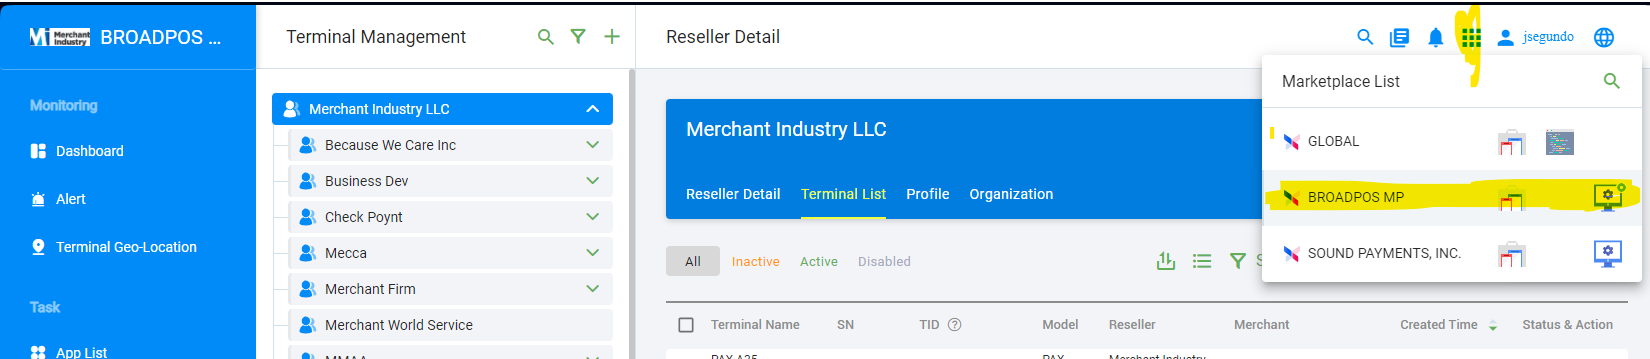
Go to 'Terminal Management'
If store has not been created already proceed to create store
Click on the '+' icon
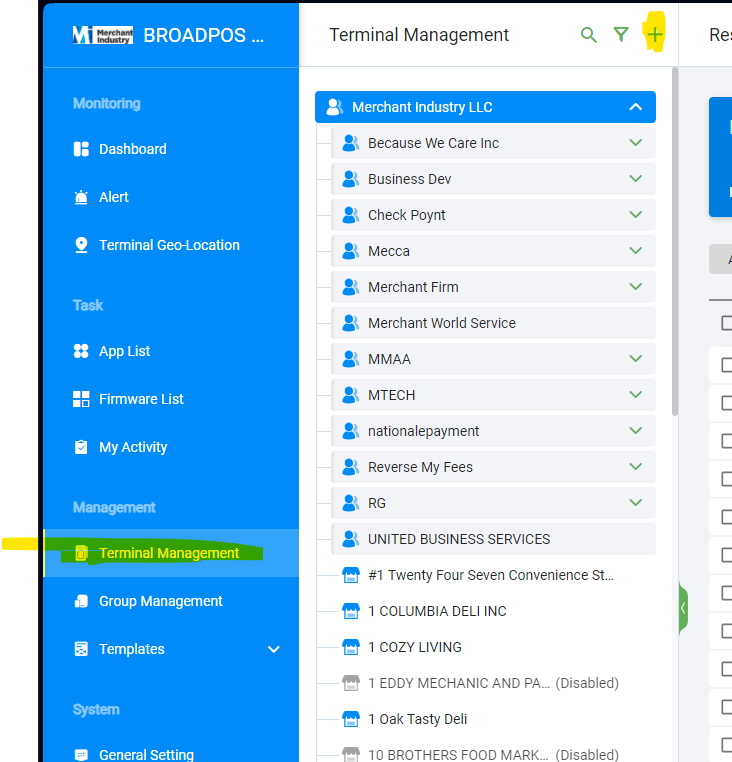
Proceed to fill out Merchant info using Datawire or CRM merchant summary
> Check off 'Activate Merchant'
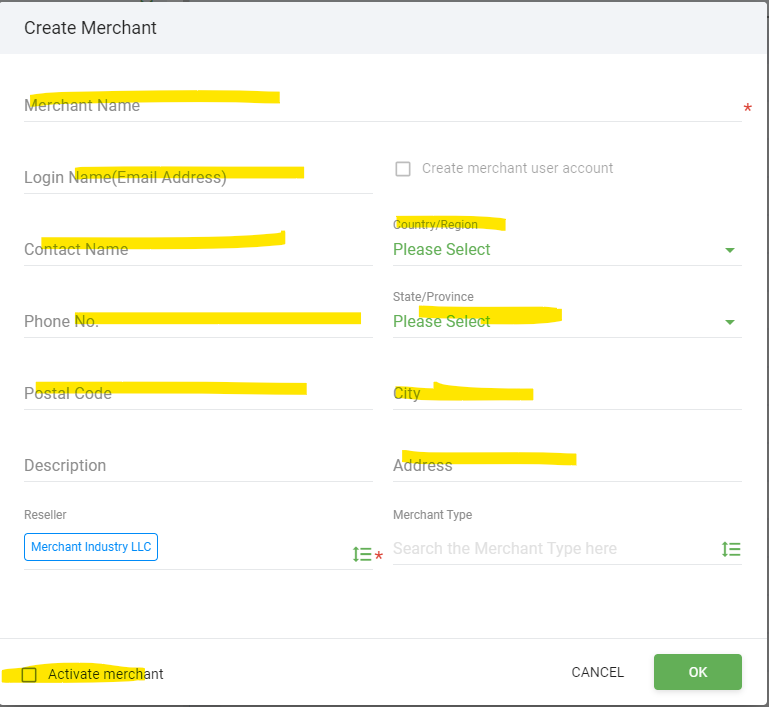
Click ok 'OK'
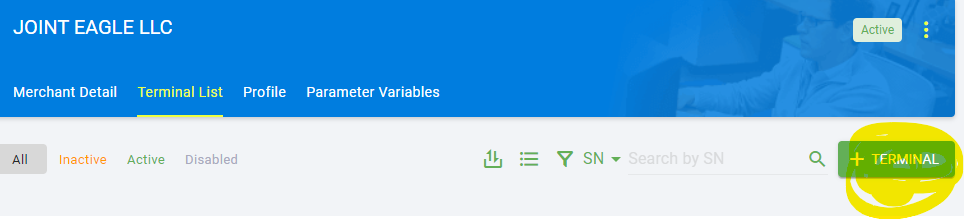
Proceed to add by clicking on the '+Terminal'
Enter all terminal info
For TID - Enter serial number as well
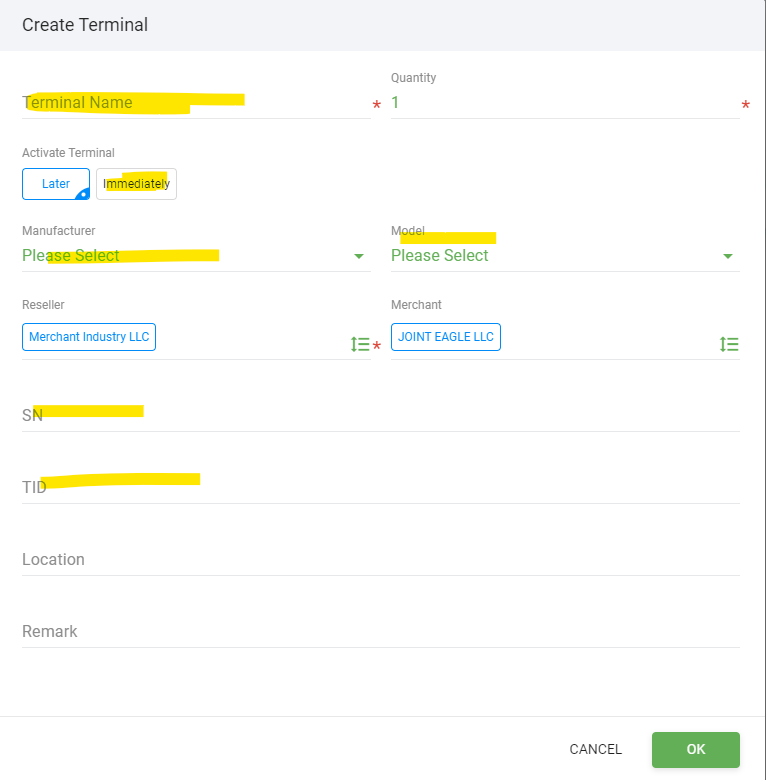
Click 'OK'
You will be prompted to a page similar to the one below.
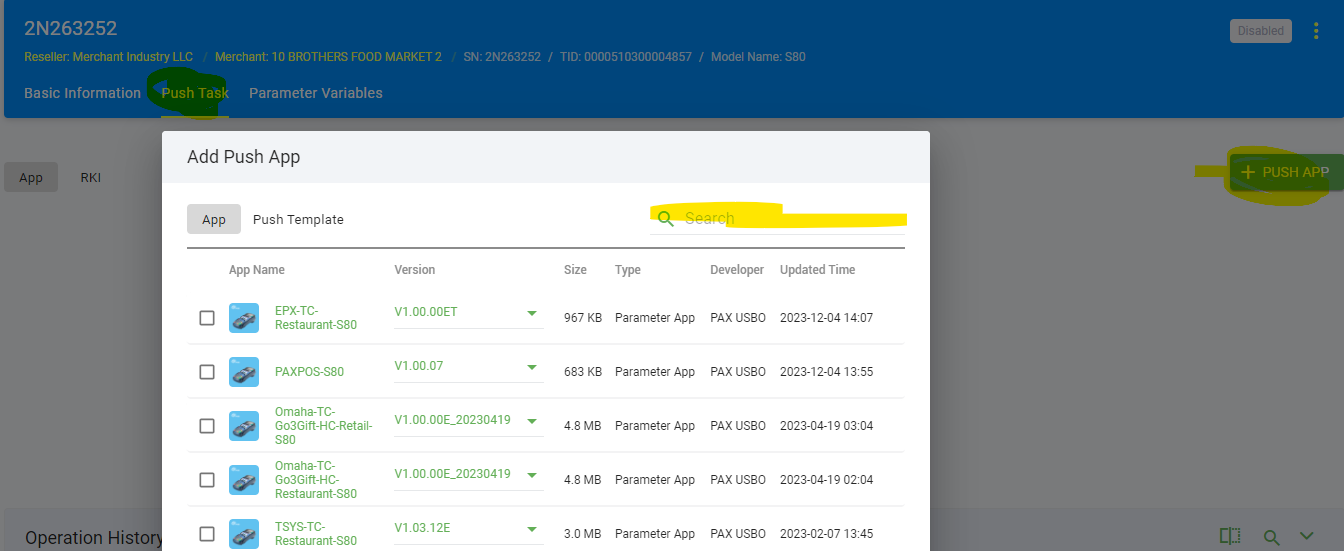
Click on 'Push Task' > Click on '+Push App'
Search 'Omaha'
Be sure to click on the correct file this will depend if it is a 'Retail' or 'Restaurant' business. For this example we will be using the 'Retail' file.
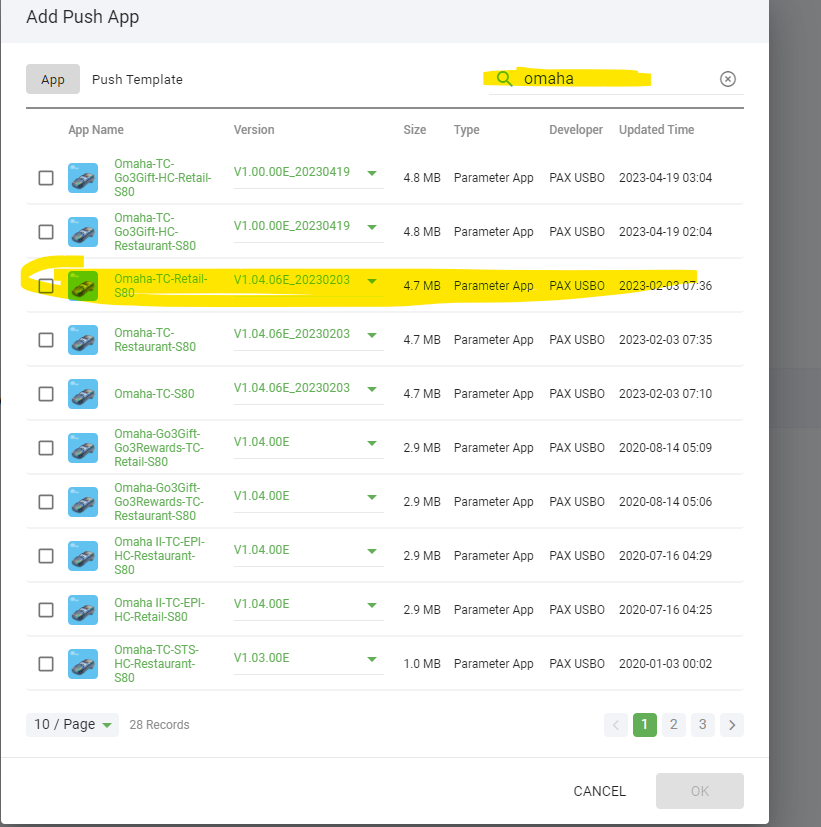
Proceed to click 'OK'
At this point you will begin to enter merchant info (similar to TSYS file build)
Under the 'Receipt' column proceed to fill out the following
(This section will differ depending on the pos system the merchant will be using. There will some instances this section will NOT need to be filled out)
Header Line 1 - Merchant business name
Header Line 2 - Street
Header Line 3 - City, State, Zip Code
Header Line 4 - Phone number
Trailer Line 1 - Thank You
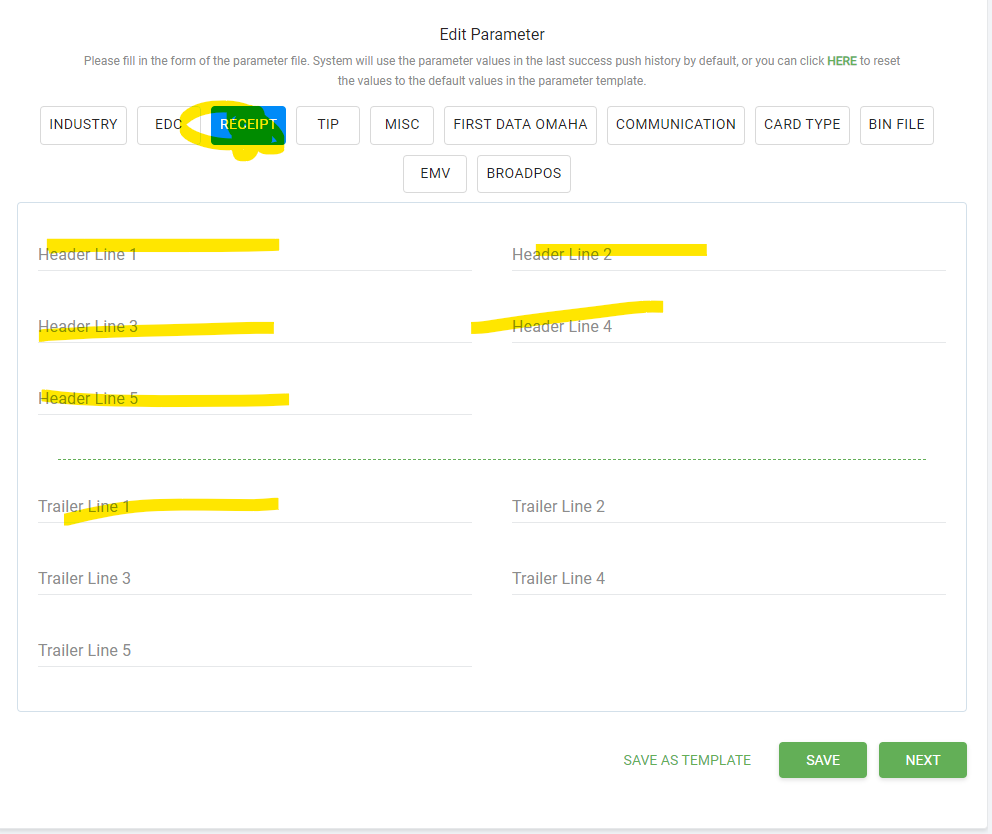
Due to this being a retail file we will be skipping over 'TIP' section
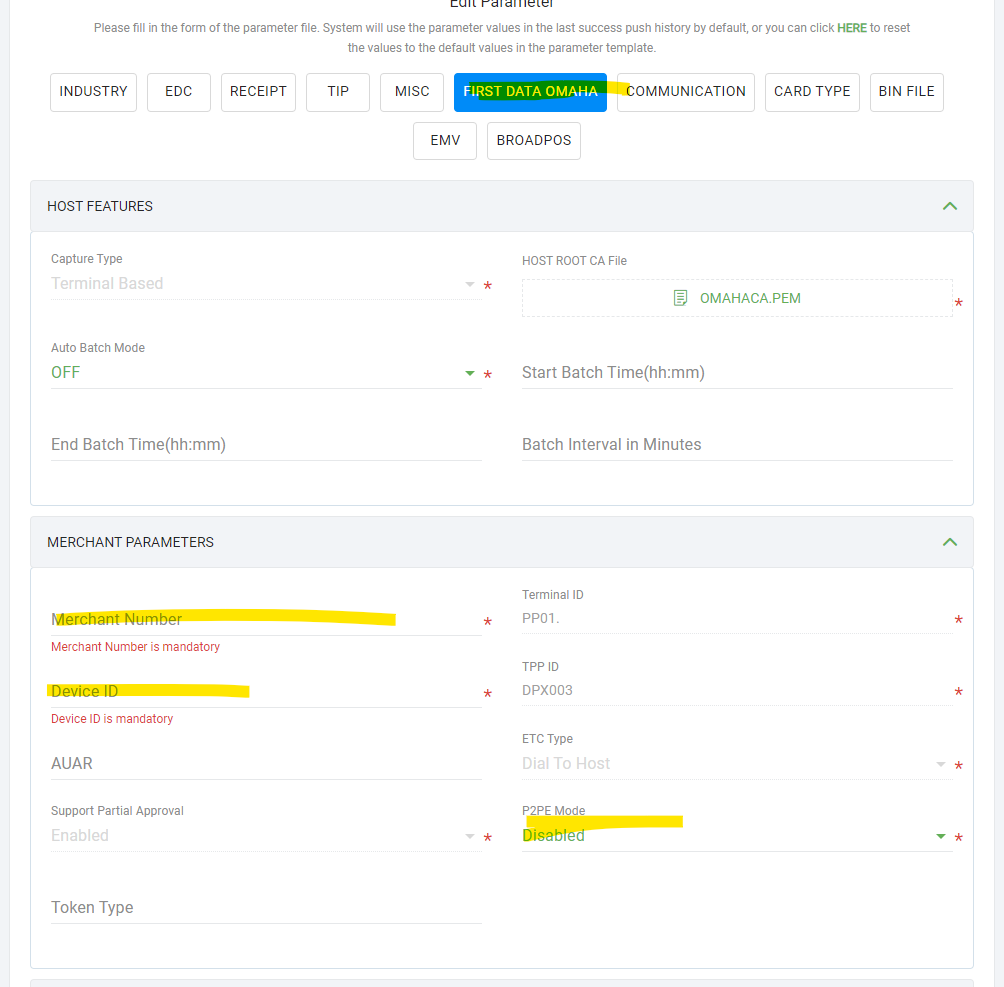
Proceed to Click on 'First Data Omaha'
In this section we will focus on the highlighted areas. Other settings may be configured depending on the POS system the pin pad will be connected to.
Merchant number - this is the MID be sure to take out the last zero
Device ID - you can find this in the Datawire TID section, you can grab any of the TID's you have created.
P2PE Mode - Be sure this setting is 'Disabled'
You can no proceed to click 'Next' >Activate
Proceed to perform download on PAX device.
This may vary depending on the PAX device.
Was this article helpful?
That’s Great!
Thank you for your feedback
Sorry! We couldn't be helpful
Thank you for your feedback
Feedback sent
We appreciate your effort and will try to fix the article