Tech Daily Metrics Update – Step-by-Step Procedure
Step 1: Set Time Zone
• Ensure your system clock is set to Eastern Time (ET) before starting.
• This is critical to ensure accurate data from 3CX reports.
Step 2: Open Tech Metrics Excel Sheet
• Locate and open the Tech Support valor Metrics Excel sheet.
• This is where you will enter the daily data.
Step 3: Get Call Report from 3CX Data Portal
1. Go to the 3CX Data Portal.
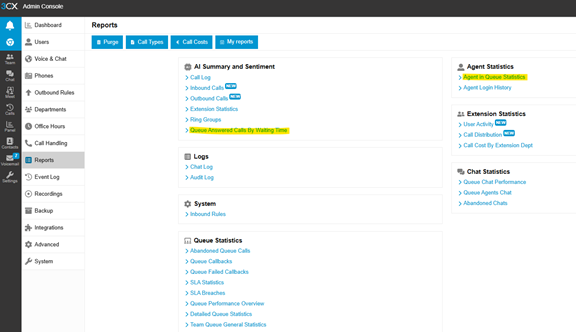
2. Navigate to the Admin Page.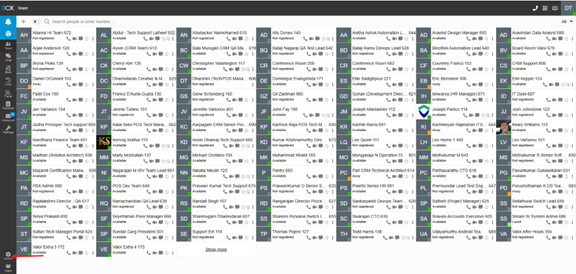
3. Click on the Reports section.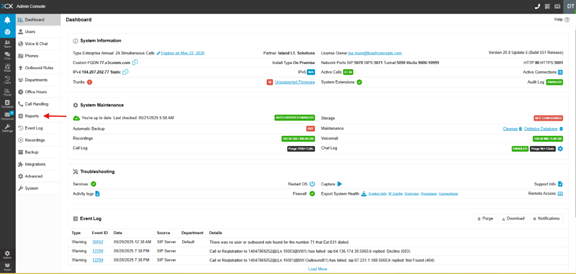
Step 4: Click the Agent Queue Statistics
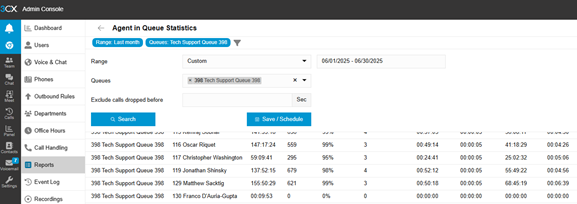
1. In the Reports section, select Agent Queue Statistics. 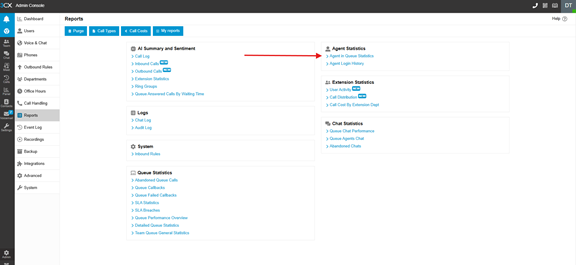
2. Choose the specific queue: 398 – Tech Support Queue. 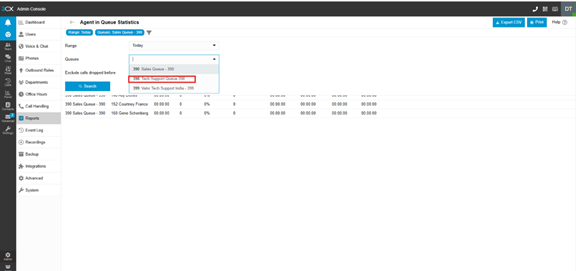
3. Set the date to yesterday. 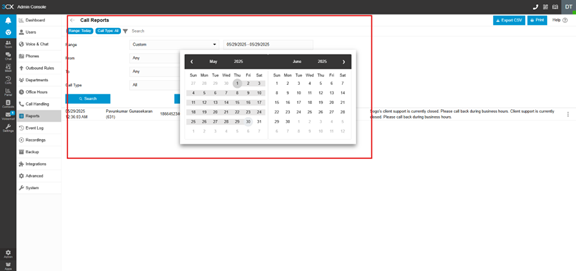 4. Click Export as Excel to download the call report.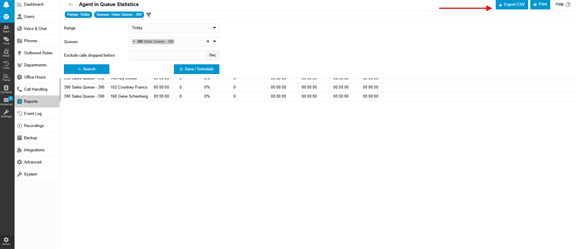
Step 5: Update Individual Agent Metrics
- The exported sheet Apply the filter to contain only the 10 agents who handled calls.
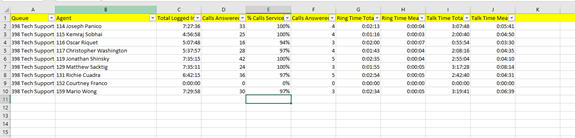 • For each of those agents, extract and update the following in the metrics sheet:
- Call Answered Calls → Enter Total Calls.
- Talk Time total → Enter as Call time
- Talk Time Mean → Enter as Average Call Time.
- Go to the call log and take the longest call for each person → Enter the Longest Call.
- Ring Time (Mean) → Enter as Average Wait.
Step 6: Update Daily Summary Metrics
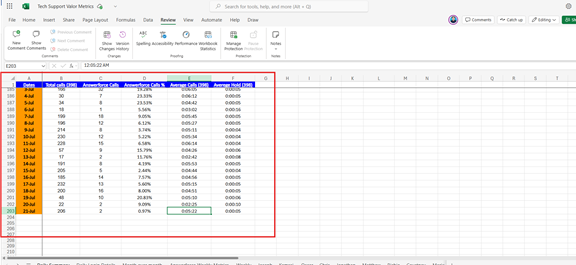
1. Total Calls → Add up all individual Call Answered count.
2. Average Calls → Take the average of the Talk Time mean.
3. Average Hold → Take the average of the Ring Time Mean values.
4. Update all values in the Daily Summary section of the Excel sheet.
Step 7: Daily Login Details
1. Go to the Reports page of the 3CX portal.
2. Navigate to Agent Login History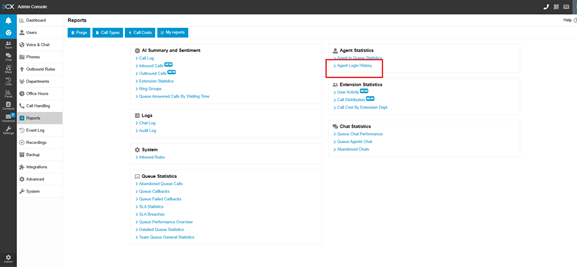 3. Select the queue: 398.4. Set the required date.
 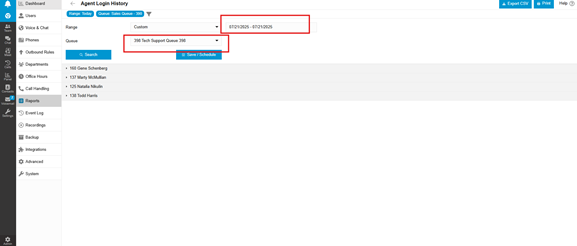 5. Click Export as Excel to download the login report.
6. Open the Excel file and apply filters to show only the specific agents you want to track.
7. Use the Text to Columns option under the Data tab in Excel to separate date and time values.
8. Remove the date portion from both "Logged In" and "Logged Out" columns.
9. Identify the last Logged In time of the day for each agent and mark it as the Logged in Time.
10. Identify the first Logged Out time of the day for each agent and mark it as the Logged-Out Time. 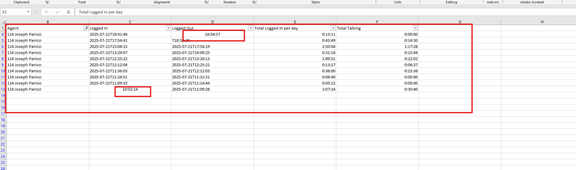 11. Count the total number of login instances per day and update it under Total Logged in Per Day.12. Count the total instances of talk time and update it under Total Talking.
13. Once all values are captured, update the Agent Login tab in the Metrics sheet.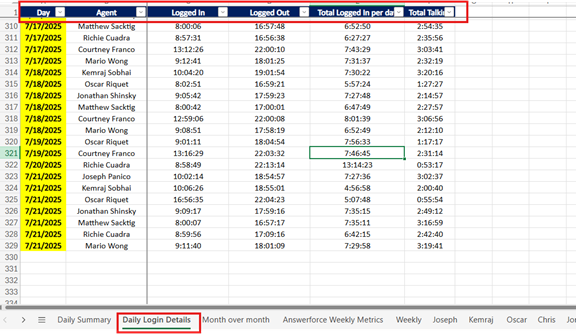
Step 8: How to Take the Report for Answer force Calls
1. Open the Answer Force app.
2. Navigate to the Settings section.
3. Go to the Reports tab.
4. Apply the required date range.
5. Filter the report by Date.
6. Set the Number filter to 'Valor Pay Tech'.
7. Choose to display only 'Inbound Calls'.
8. Export the report as an Excel file.
9. Open the Metrics sheet and go to the 'Daily Summary' tab.
10. Enter the total call count from the Answer force report into the appropriate cell.
11. Navigate to the 'Answer Force Weekly Metrics' tab.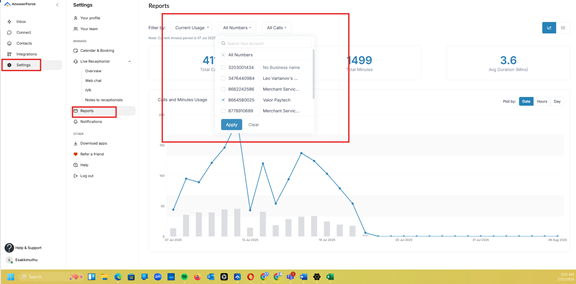 12. Update the call data for the specific time frame using the values from the Answer force report.

Step 9: Month over month
This should be updated at the end of each month.
Valor Support Metrics 2025
- Total calls --> Should be the calls present on that month.
- Answered calls --> Formula already incorporated, same as total calls.
- Answer force Calls --> Formula already incorporated, same as Answered calls.
- Avg. Ring Time --> From the monthly report, take the average Ring time and update it on the audit sheet.
- Max Ring Time --> From the monthly report, take the maximum Ring time and update it on the audit sheet.
- Avg Call Duration --> From the monthly report, take the average Call duration and update it on the audit sheet.
- Longest Call time --> Take the Monthly report and filter the longest call time and update it on the audit sheet.
- Agents available to take calls --> Toal Number of agents attending the calls.
Ring Duration
This Field requires various formulas to calculate the Call durations.
Go to the “Queue Answered calls by waiting time” on 3CX portal under reports and take the report by filtering the required month.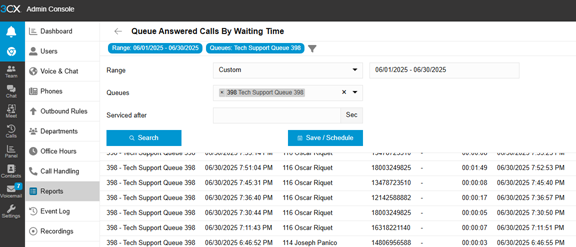
- Time to Answer SLA --> Default % should be updated here as 80%.
- Abandonment SLA --> Default % should be updated here as 3%.
- Lost Calls --> Check for any calls that failed.
Formulas:
- For <20 Seconds, the formula will be,
=COUNTIF(Range,"<0:00:20") / COUNTA(Range) - For <30 Seconds, the formula will be,
=COUNTIF(Range,"<0:00:30") / COUNTA(Range) - For 20 - 59 Seconds, the formula will be,
=COUNTIFS (E: E,">=00:00:20", E: E,"<00:01:00") / COUNTA (E: E)
- For 60 - 89 Seconds, the formula will be,
=COUNTIFS (E: E,">=00:01:00", E: E,"<00:01:30") / COUNTA (E: E)
- For 90 - 119 Seconds, the formula will be,
=COUNTIFS (E: E,">=00:01:30", E: E,"<00:02:00") / COUNTA (E: E)
Thus the values should be updated in the Audit sheet.
Was this article helpful?
That’s Great!
Thank you for your feedback
Sorry! We couldn't be helpful
Thank you for your feedback
Feedback sent
We appreciate your effort and will try to fix the article