Access the CRM:
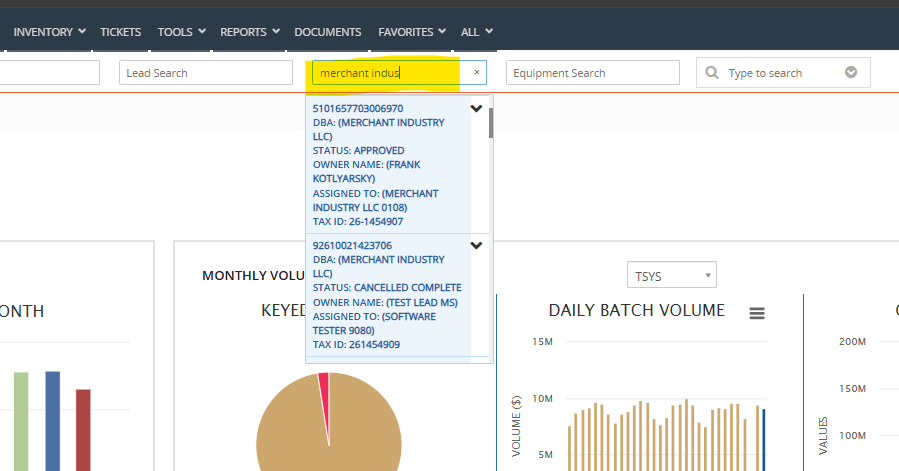
Navigate to https://mi.isoaccess.com/index.php.Search for the Merchant:
Use one of the following:MID (last 6 digits are sufficient)
Phone number
Email address
Tax ID
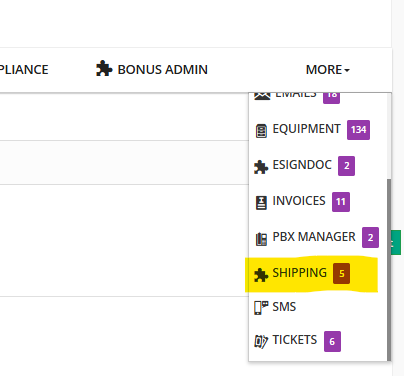
Click “More” on the right-hand side.
Select “Shipping” from the dropdown
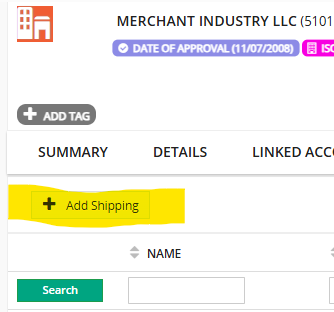
Click “Add Shipping” on the left.
If shipping to the ISO, select “Shipment To” under Shipping Details
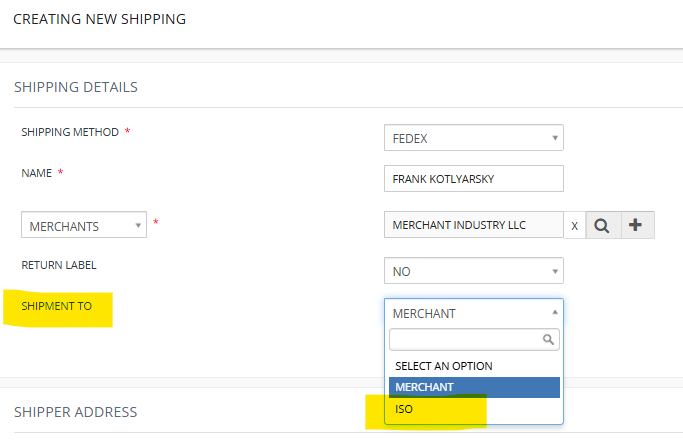
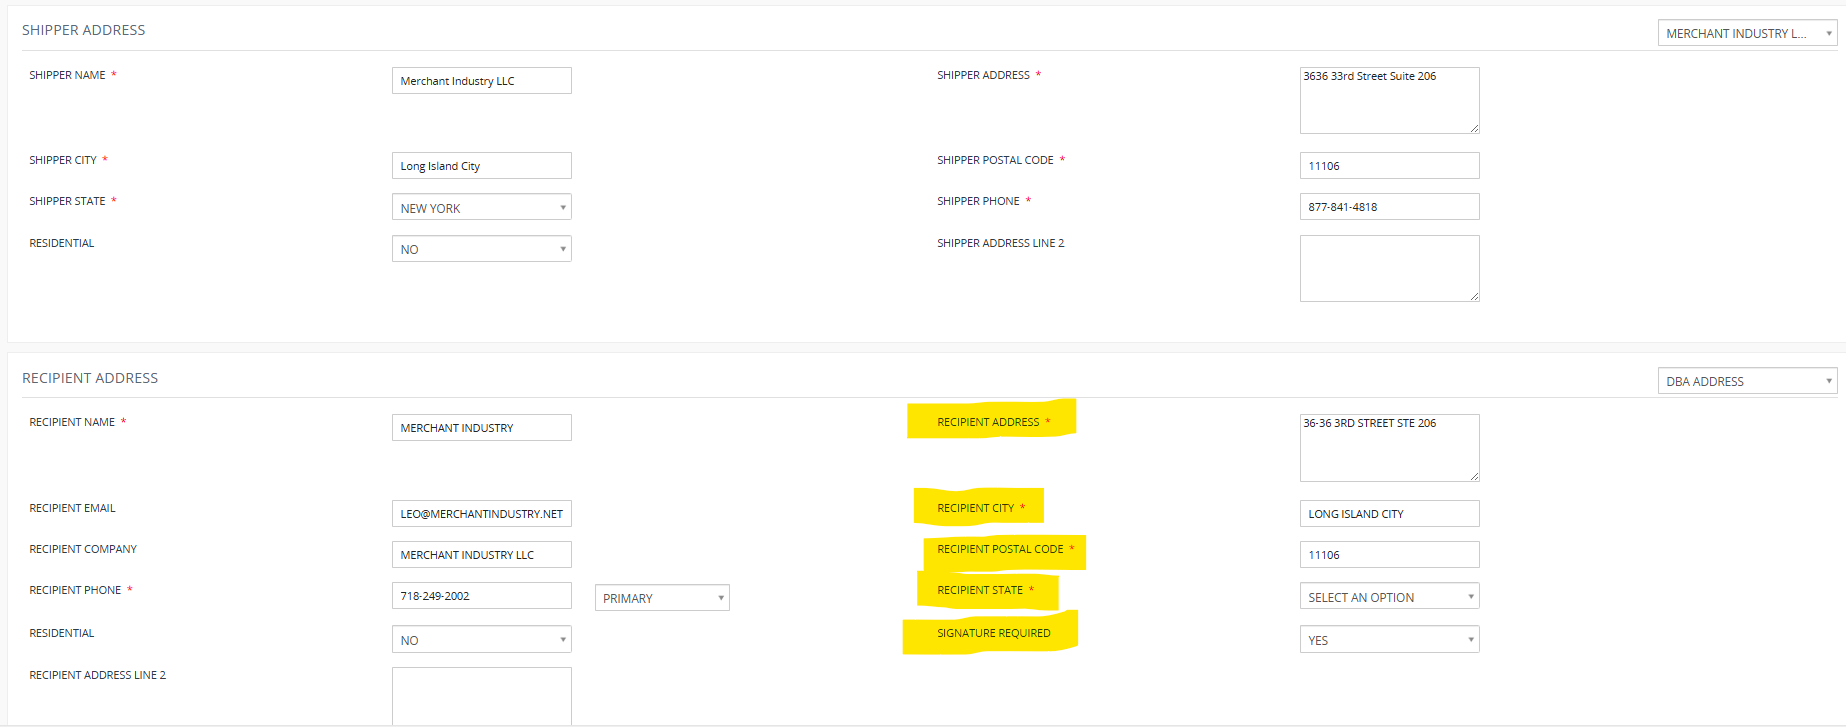
Verify all recipient and address details match the ticket.
Make corrections as needed
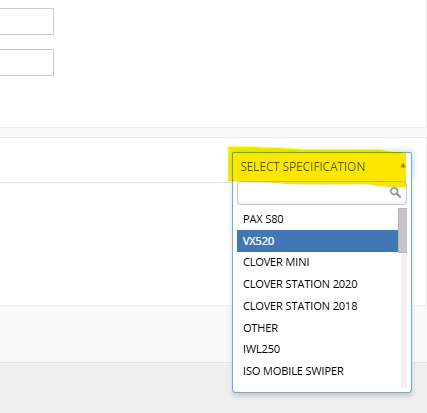
Scroll to the bottom and click “Select Specification”.
Choose the correct equipment brand.
For non-terminal items (e.g., SIM card, charging cord), select “Other”.
Click “Add”
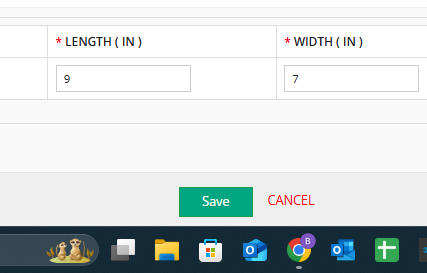
Click “Save”.
The page will refresh
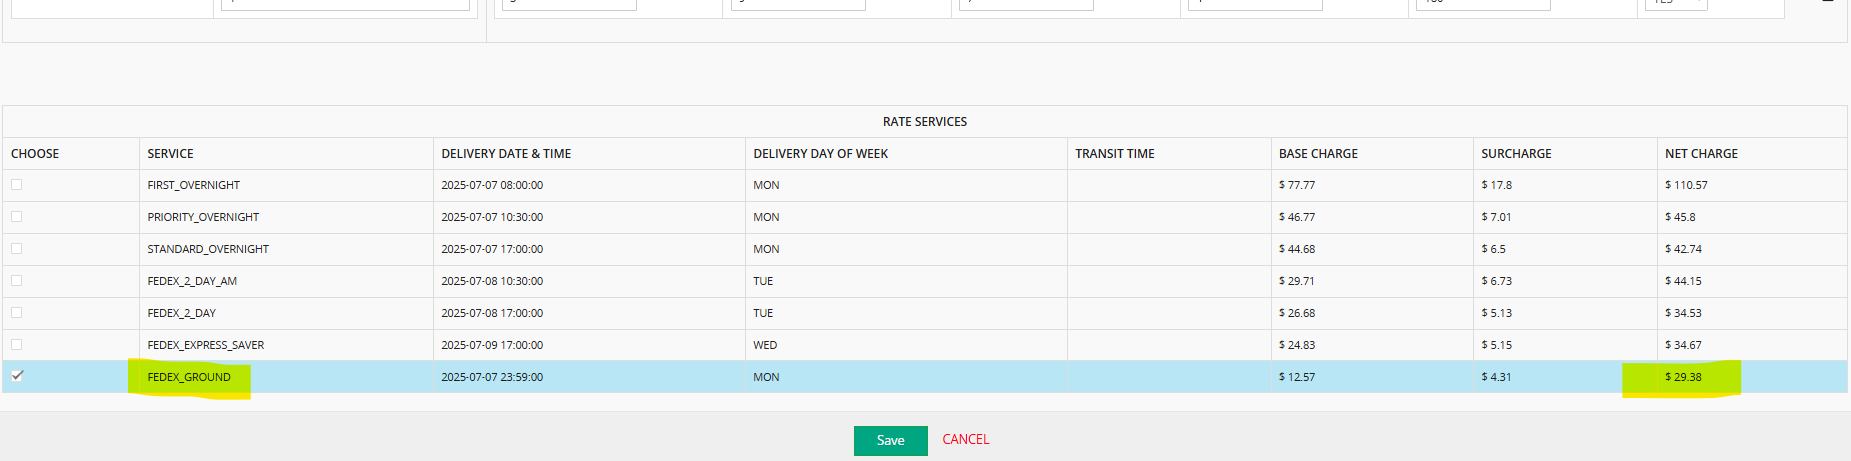
Scroll down to select Express or Ground shipping.
Refer to the ticket for instructions.
If unspecified, default to Ground.
Click “Save”.
Click “Show Label” to print
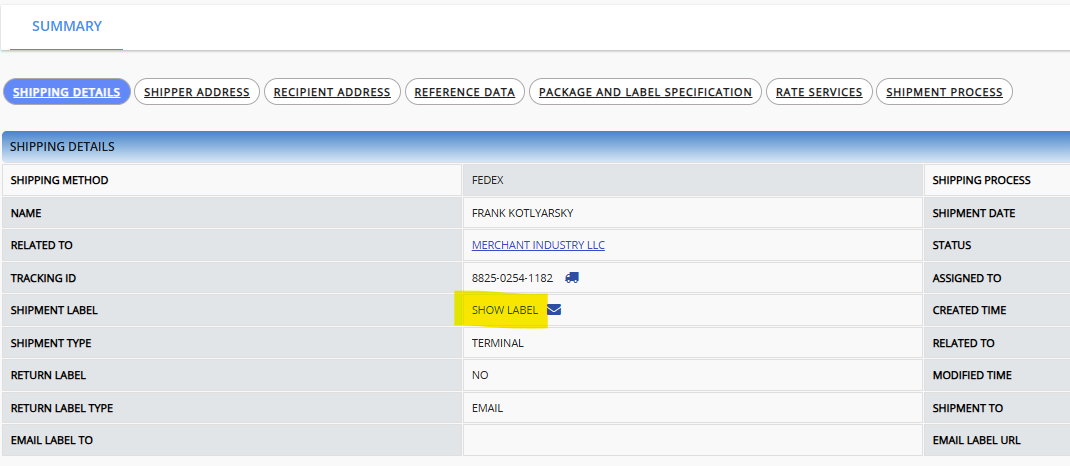
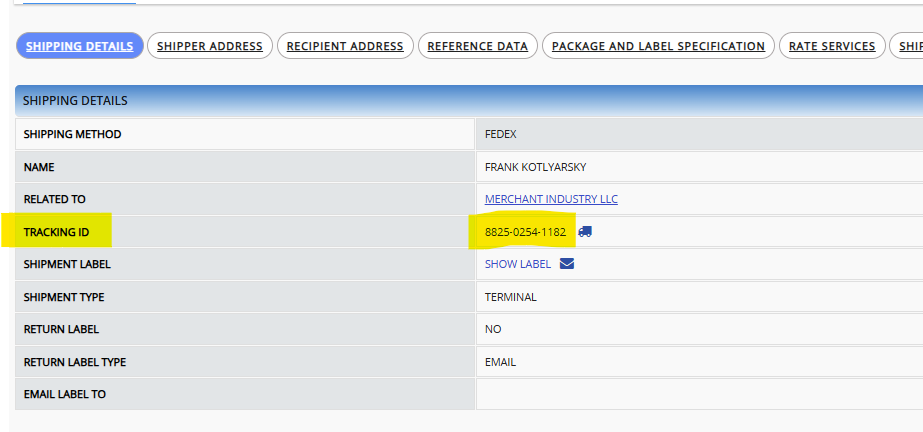
Note the Tracking Number under Shipping Details.
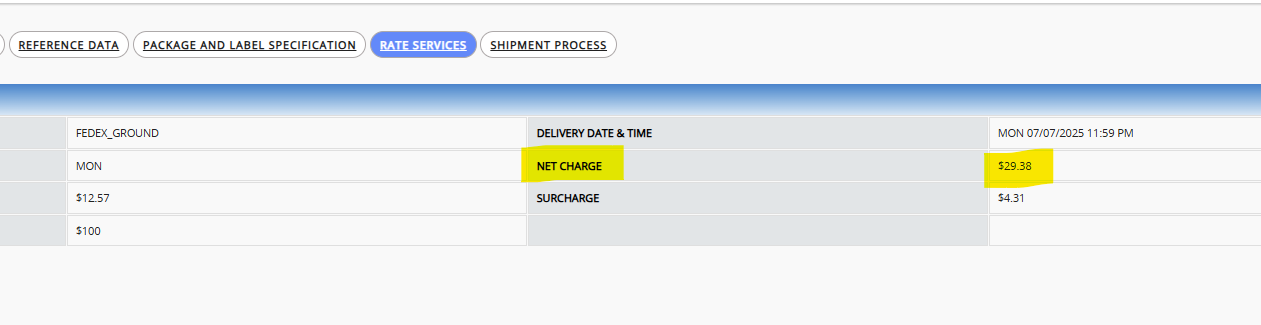
Note the Net Charge under Rate Services for invoicing
In the invoice:
Enter the Tracking Number in the Misc Description field.
Enter the Net Charge as the Misc Fee.
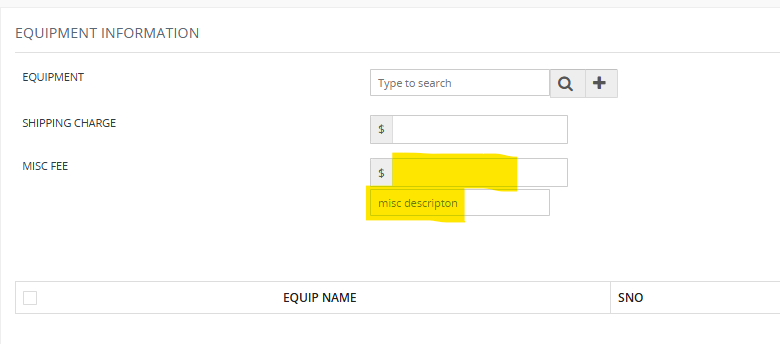
Click “Add”

Was this article helpful?
That’s Great!
Thank you for your feedback
Sorry! We couldn't be helpful
Thank you for your feedback
Feedback sent
We appreciate your effort and will try to fix the article